Setting HTTPS with TLS for our REST API
Published at Apr 14, 2023
Security 1: Malicious packet sniffing
Packet sniffing is the practice of using software tools to observe data as it moves across a network, it is a useful tool to investigate
security incidents or debug network issues. Malicious actors can insert themselves
in the middle of an authorized connection between two devices and use this tool to spy on every data packet going through the connection.
Their goal is to find valuable information in the data packets that they can use for their advantage.
Packet sniffing can be passive or active :
Passive packet sniffing is a type of attack where data packets are read in transit. We can compare it to a postal delivery person maliciously reading somebody’s mail.
Active packet sniffing is a type of attack where data packets are manipulated in transit. This may include adding or modifying information the packet contains. We can compare it to a neighbour telling the delivery person “I will deliver that mail for you” and then reading the mail or changing the letter before putting it in your mailbox.
A widely known tool for packet sniffing is Wireshark. Here we can see it sniffing a GET request to our local api container that uses HTTP.
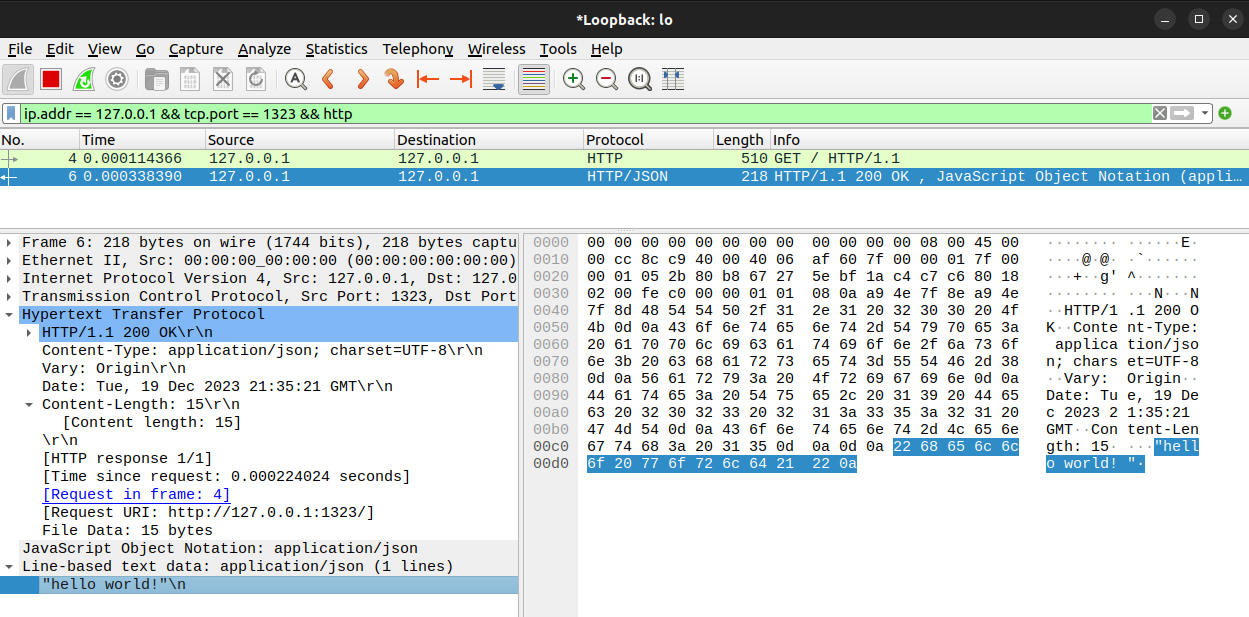
As a developer, malicious packet sniffing can be prevented with HTTPS which encrypts the communication between client and server. The encryption helps to protect from :
passive sniffing: data encrypted can not be used to get valuable information.
active sniffing: if packet is modified, the server will invalidate packet when unencrypting it. We will see in a moment that there is a more sophisticated type of sniffing called MITM(man in the middle attack) that can overcome the encryption.
This picture is the same GET request but to a server using HTTPS.
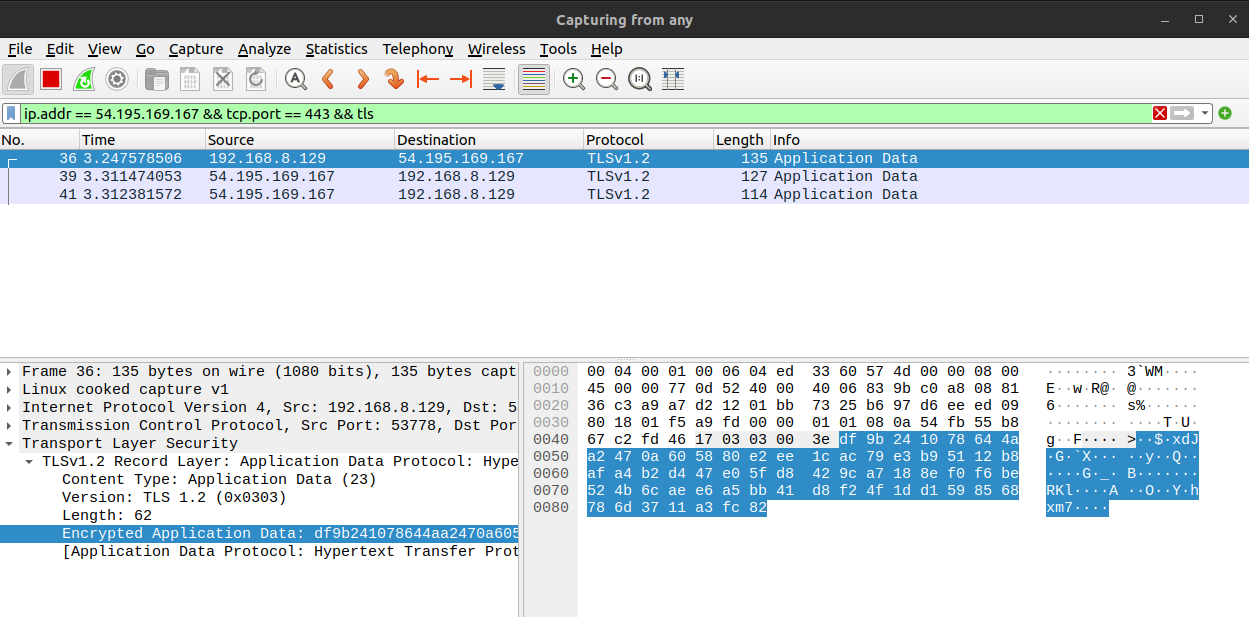
SSL/TSL certificates are what enable websites to use HTTPS.
What is an SSL/TSL certificate
TLS, previously knows as SSL, is a protocol for :
- Encrypting internet traffic
- Verifying server identity
More info https://www.cloudflare.com/learning/ssl/what-is-an-ssl-certificate/
Risks if not implemented https://www.invicti.com/blog/web-security/man-in-the-middle-attack-how-avoid/
Implementing HTTPS with TLS certificate (manually) in an EC2 instance
Setup dns to your ec2 instance using Route53. In this example, I will use api.klokken.kanatari.com
Setup certificate with certbot:
This step should be done in server so certificate authorizer can authenticate your server IP with your DNS domain
We can use a docker with certbot to avoid having OS installation problems. The next command will create certificates in certs folder, note the expose of port 80 for authentication challenge.
docker run -it --rm --name certbot \
  -v "${PWD}/certs:/etc/letsencrypt"  \
  -v "${PWD}/certs:/var/lib/letsencrypt"  \
  -p 80:80\
  certbot/certbot certonly --standalone \
  -d api.klokken.kanatari.com
More info in certbot docs
What will happen?
- certbot will create a dummy server to respond challenge on port 80 (authentication challenge) because we don’t have a server running now.
- /etc/letsencrypt is the folder where our certificates will be created
- /var/lib/letsencrypt is the working folder where lock files will be created ( to prevent overwriting )
- Follow the CLI questions and when the domain is requested, use the domain that has a DNS pointing to your current server. If you introduce another domain, the authentication challenge does not success.
Once it finishes succesfully.The certificates demonstrate that you own the DNS and is not constrained by the IP of the server. To test it, you can restart the EC2 instance to obtain a new public IP, then update the IP in Route53 subdomain and try again. The certificate is still valid.